Get started with NeverMetered: from sign-up to your first request
Updated 10 November 2026
By the end of this page you'll have an account, an API key, a coding tool talking to NeverMetered, and your first request showing up in your dashboard. It takes about five minutes, and every step has a screenshot from the real dashboard so you can see what to click.
Before you start
- An email address you can open: you'll need to click one link in it.
- A coding tool you already use, such as Claude Code, Codex CLI, OpenCode, Cline or Cursor. Don't have one yet? You can test with a single
curlcommand instead (see below). - A terminal. On macOS press ⌘ Space, type Terminal and press Return. On Windows open the Start menu, type PowerShell and press Enter.
The five steps
- 1
Create your account
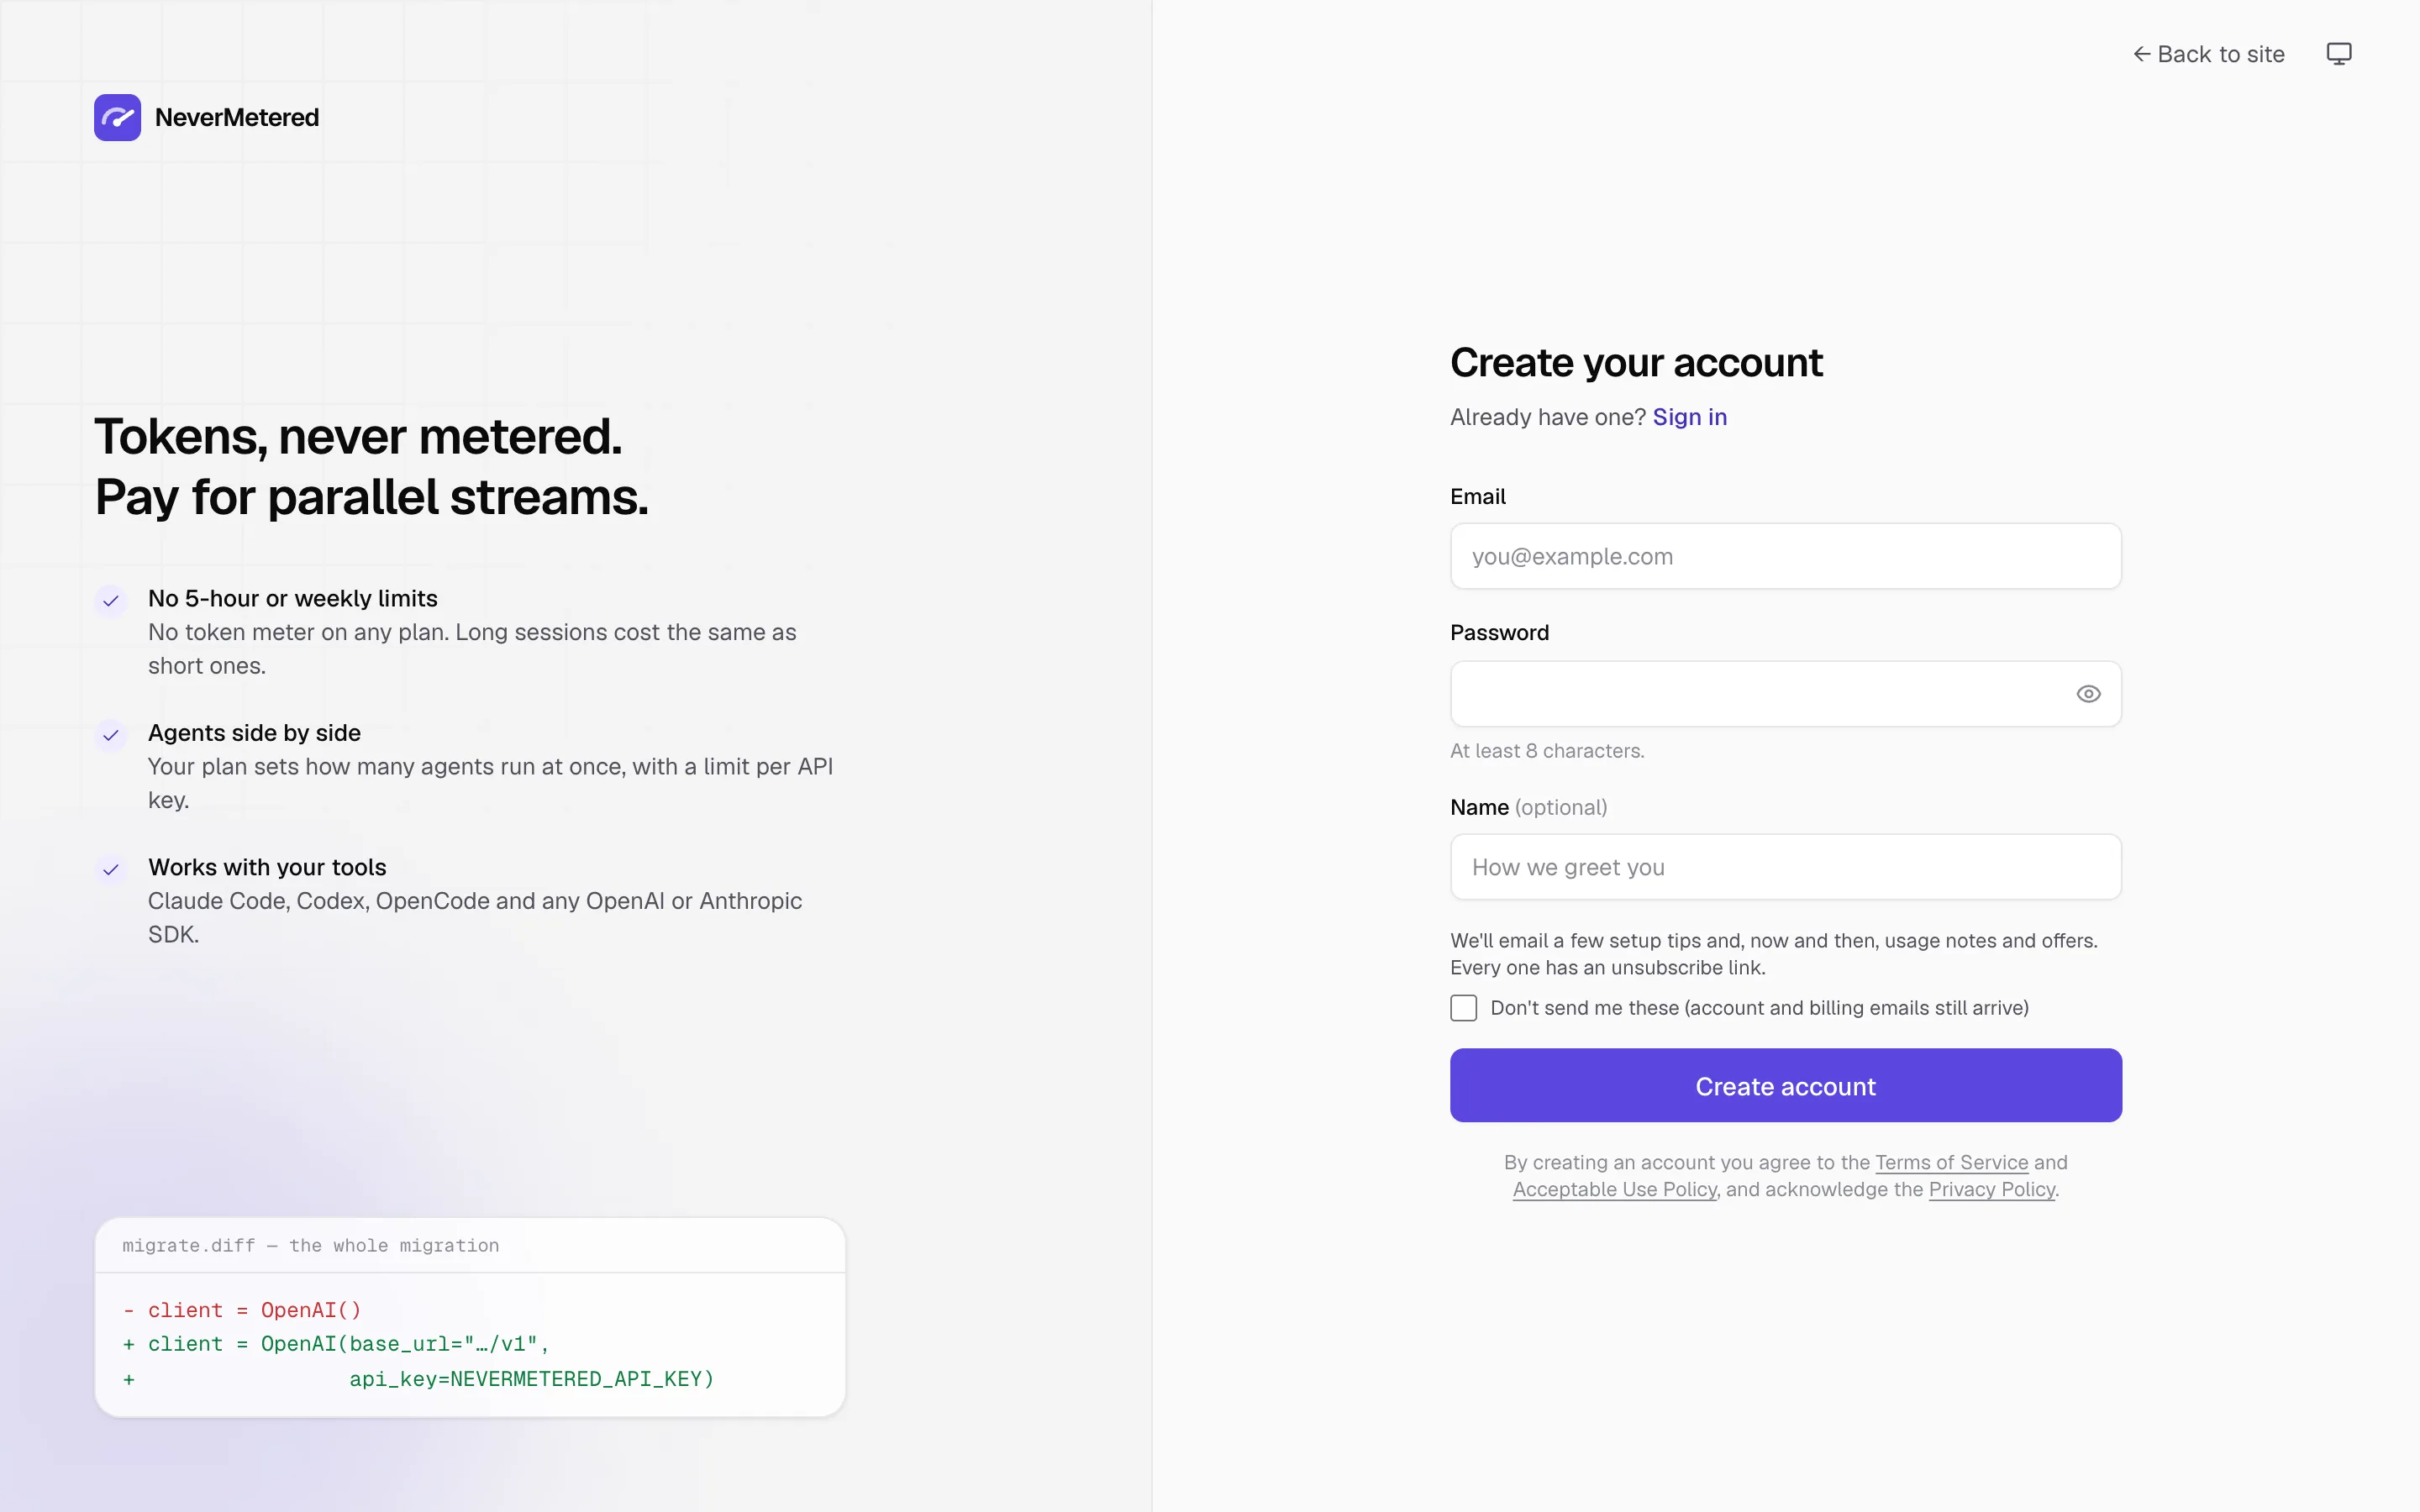
Go to the sign-up page, enter an email and a password (at least 8 characters) and press Create account. Your name is optional.
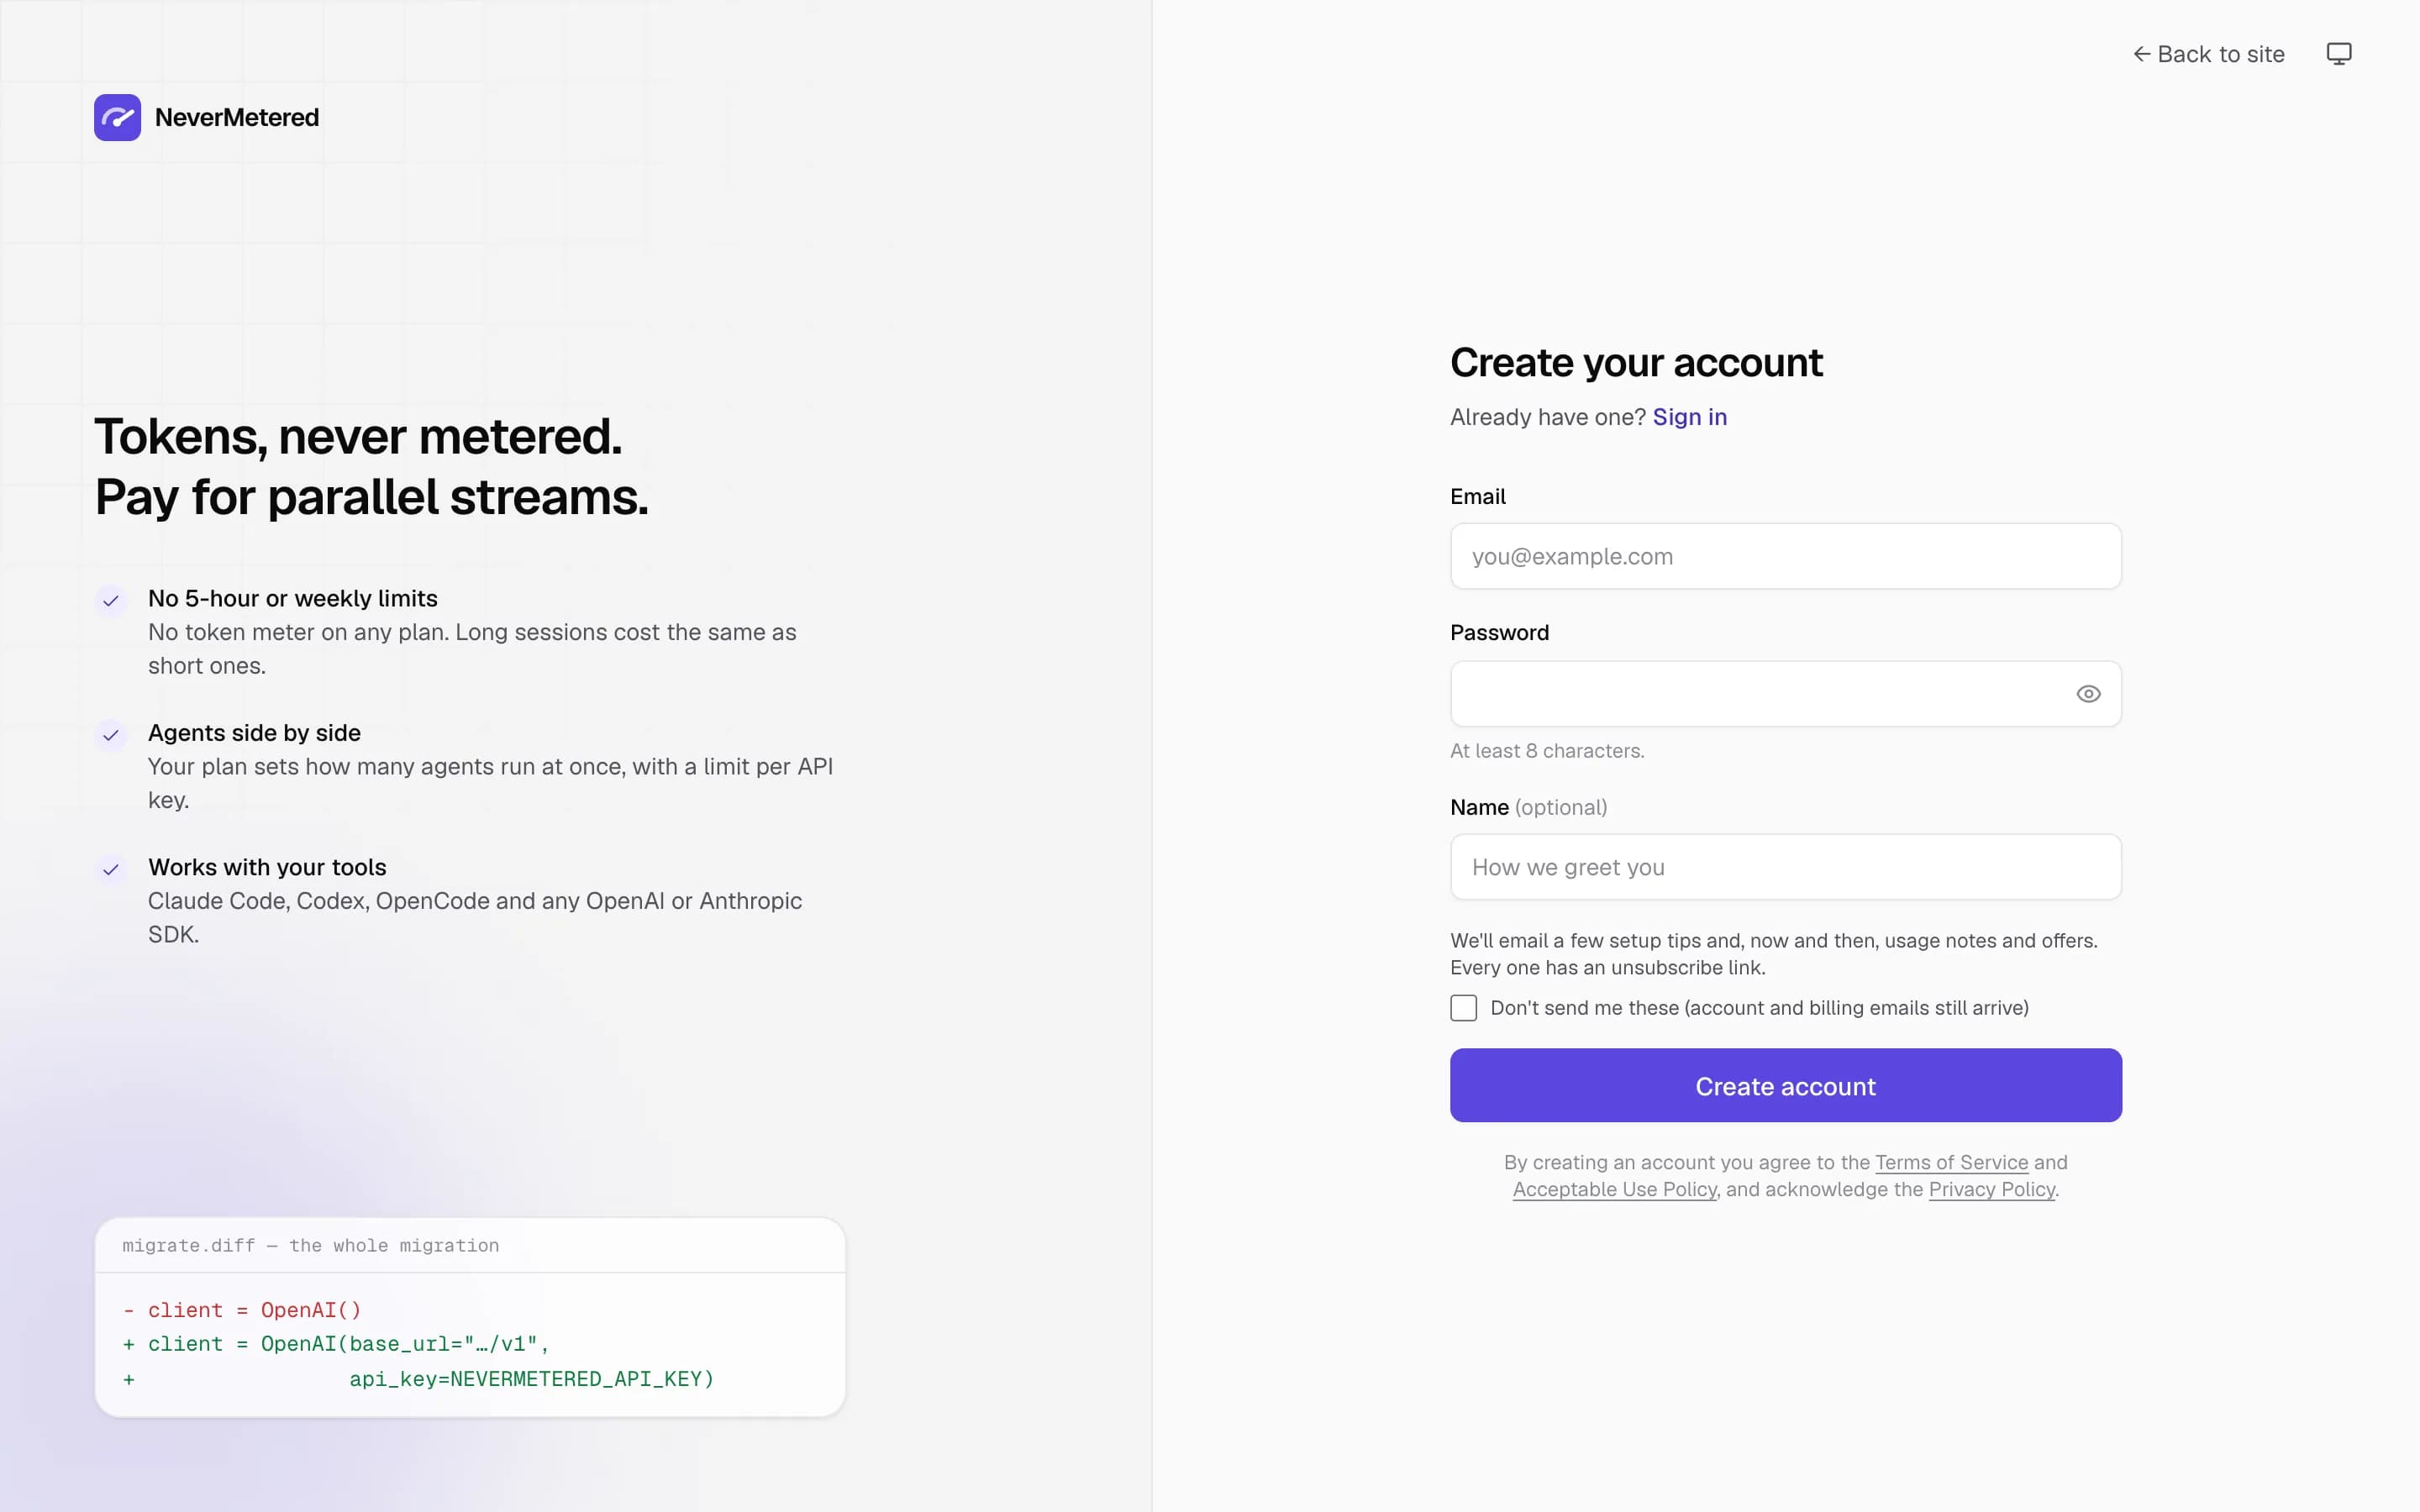
The sign-up page. (tap to enlarge) - 2
Verify your email
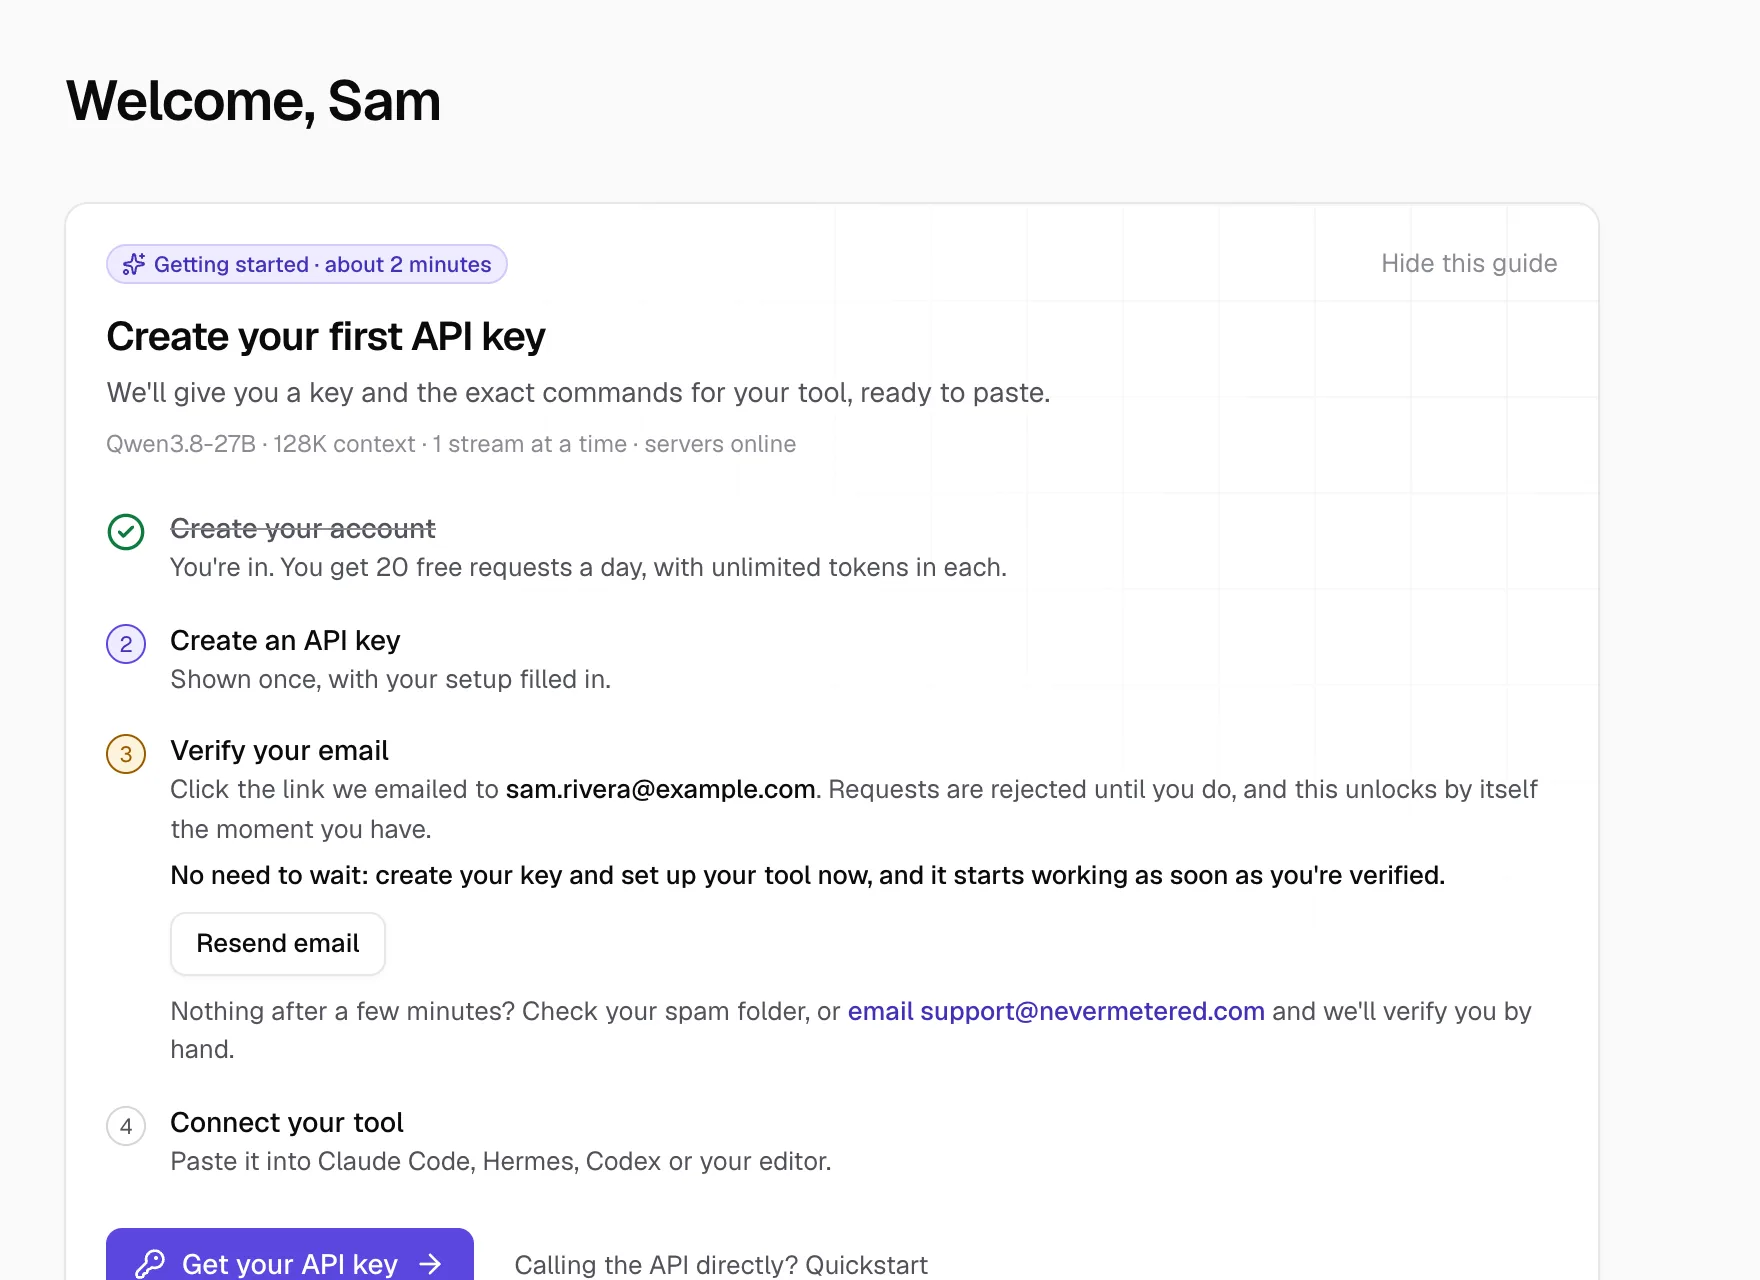
We email you a link. The free requests stay switched off until you click it, and your dashboard tells you so. You don't have to wait: you can carry on to the next step now, and your key starts working the moment you're verified. No email after a few minutes? Check your spam folder, or press Resend email in the dashboard.
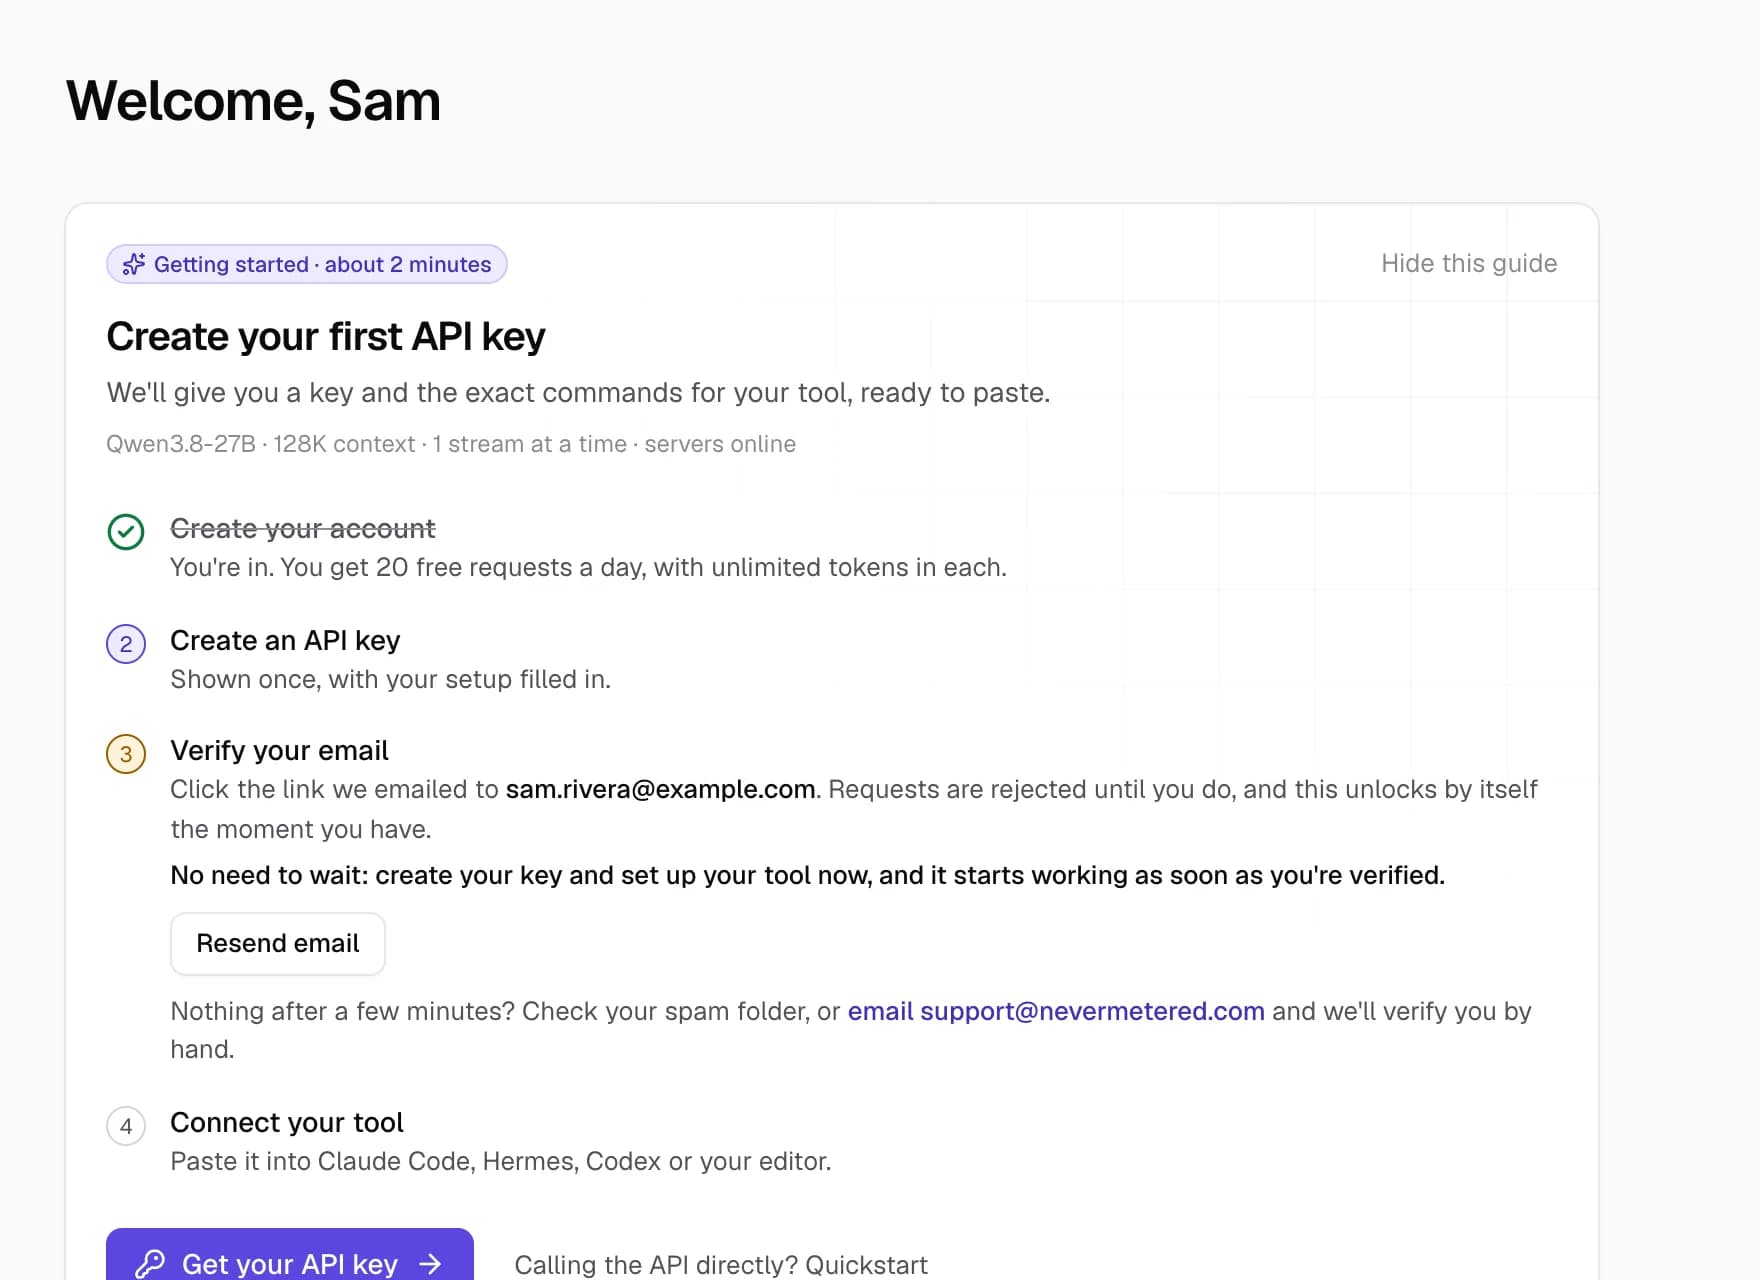
Your first screen is a four-step checklist. Example account with demo traffic. (tap to enlarge) - 3
Create an API key
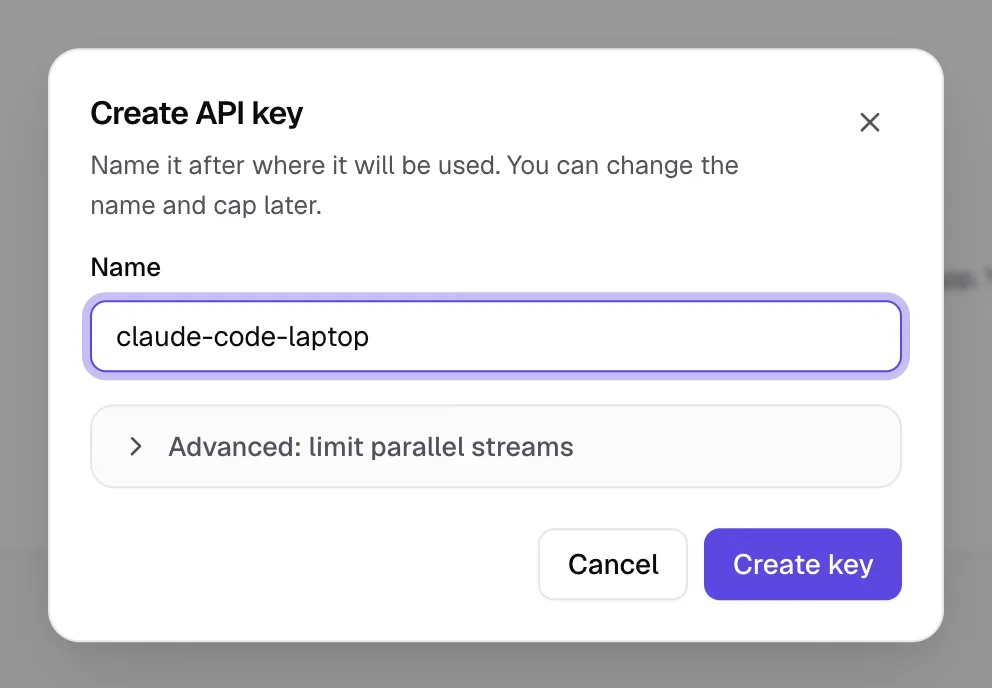
A key is the password your tool uses to talk to NeverMetered. Open API keys, press Create your first key and name it after where you'll use it, for example
claude-code-laptop. Leave the advanced option alone for now: it's only for limiting how many requests one key can run at once (see one key per project).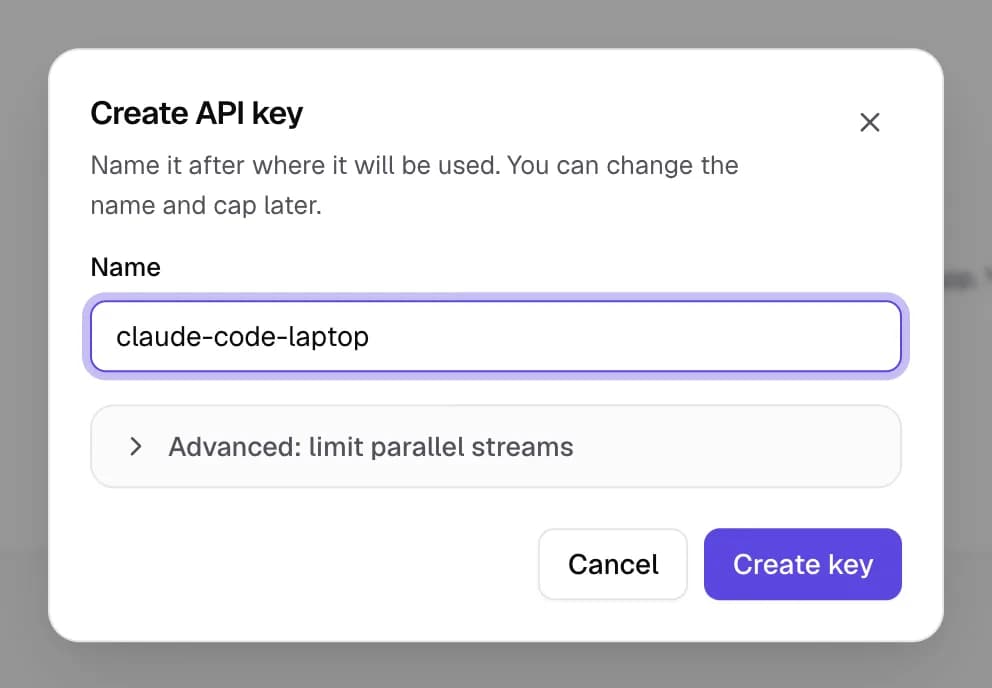
Name the key after the tool or machine. (tap to enlarge) - 4
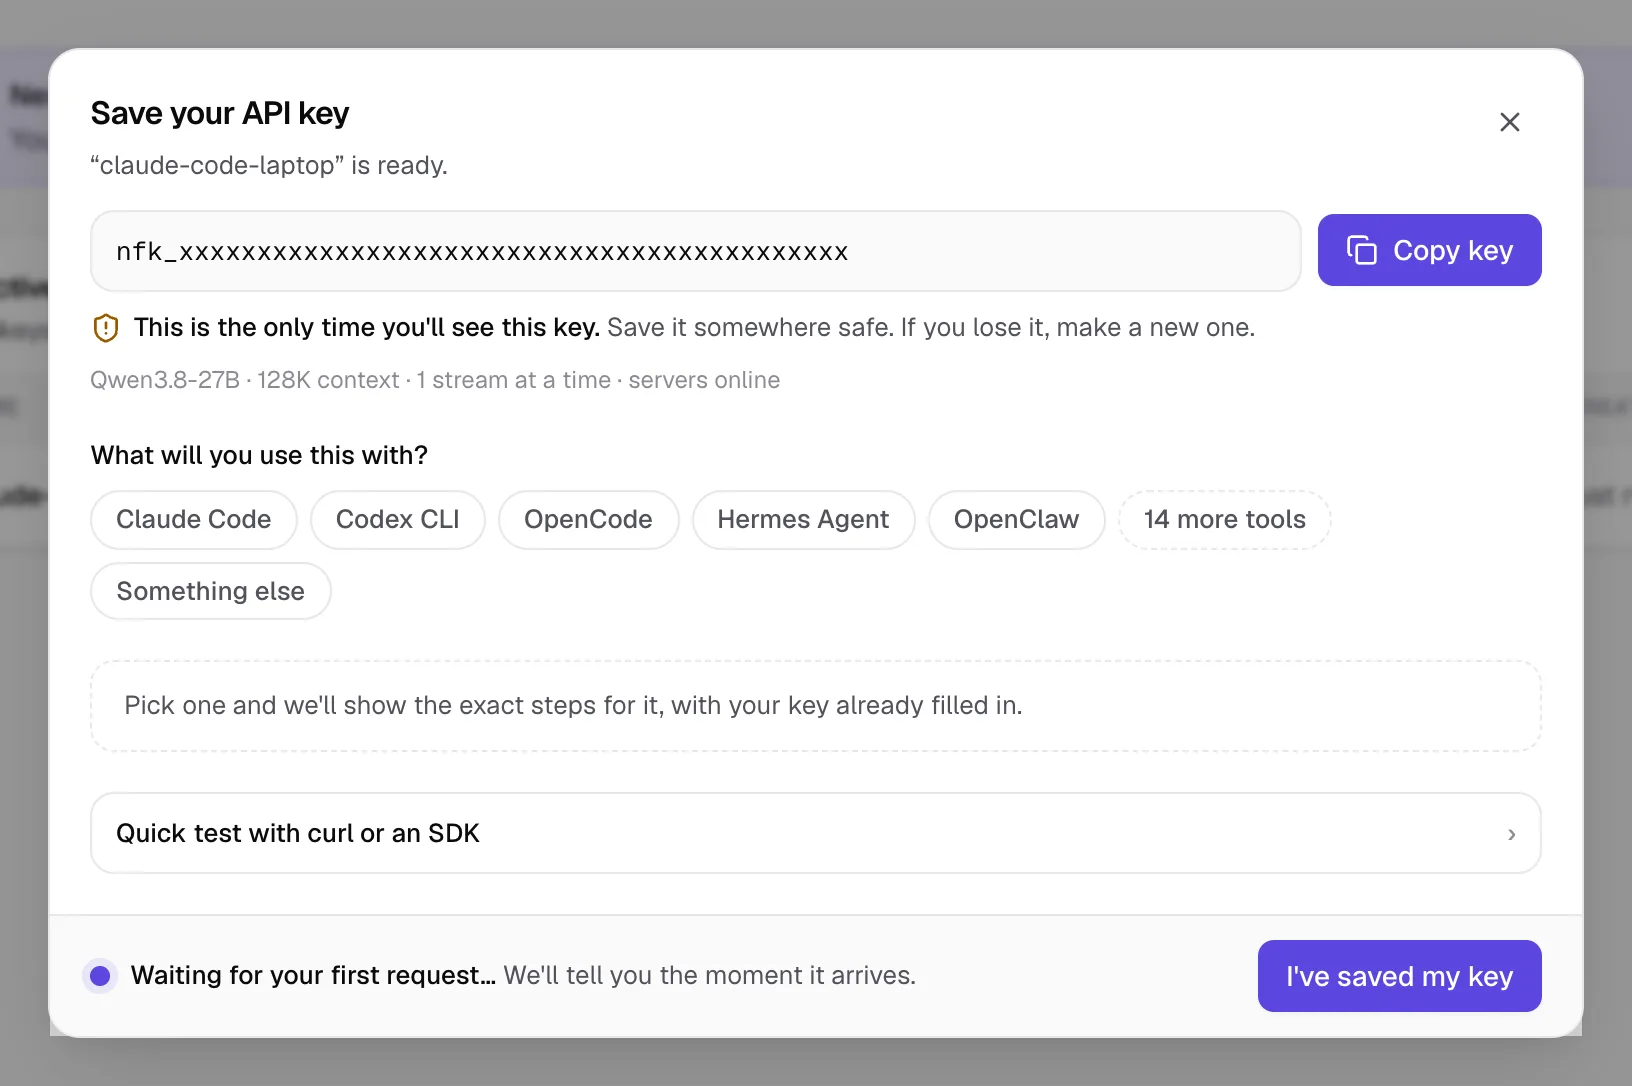
Copy your key somewhere safe
The key is shown once. Press Copy key and paste it into your password manager. If you lose it, nothing is broken: make a new one and revoke the old one. You don't have to copy it by hand into your tool: the next step fills it in for you.
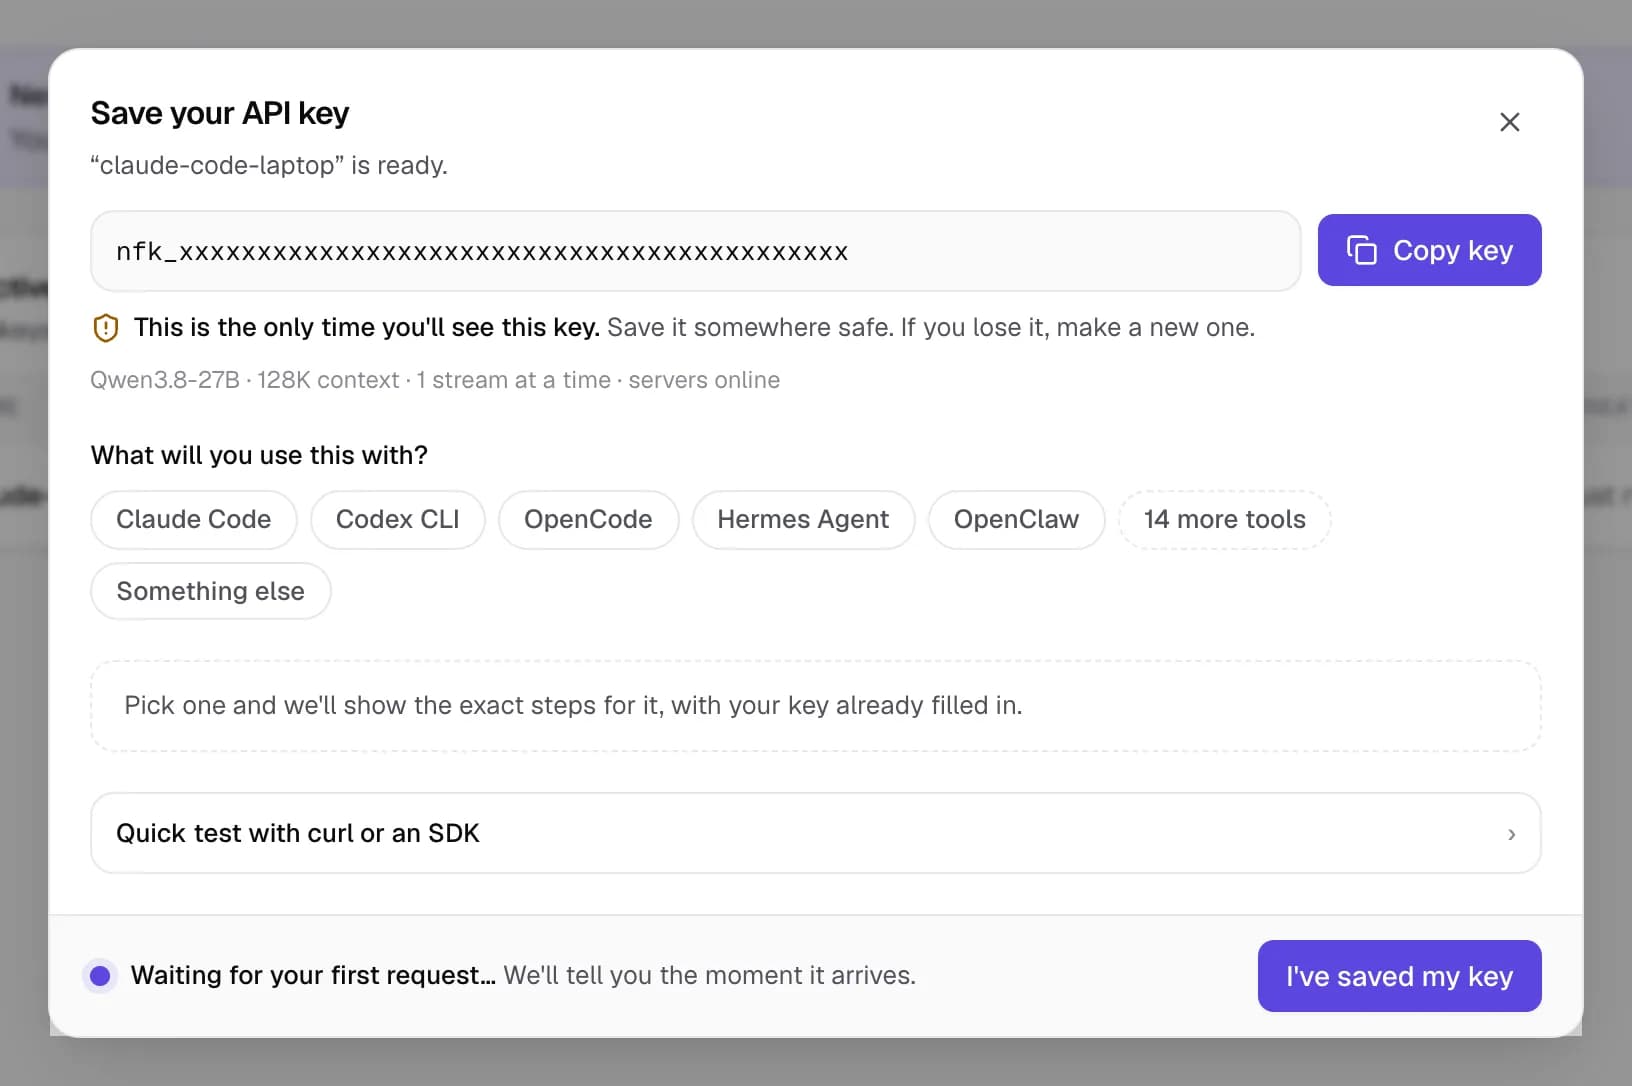
Example account with demo traffic. The key shown here is a throwaway from a test system. (tap to enlarge) - 5
Pick your tool and paste the setup
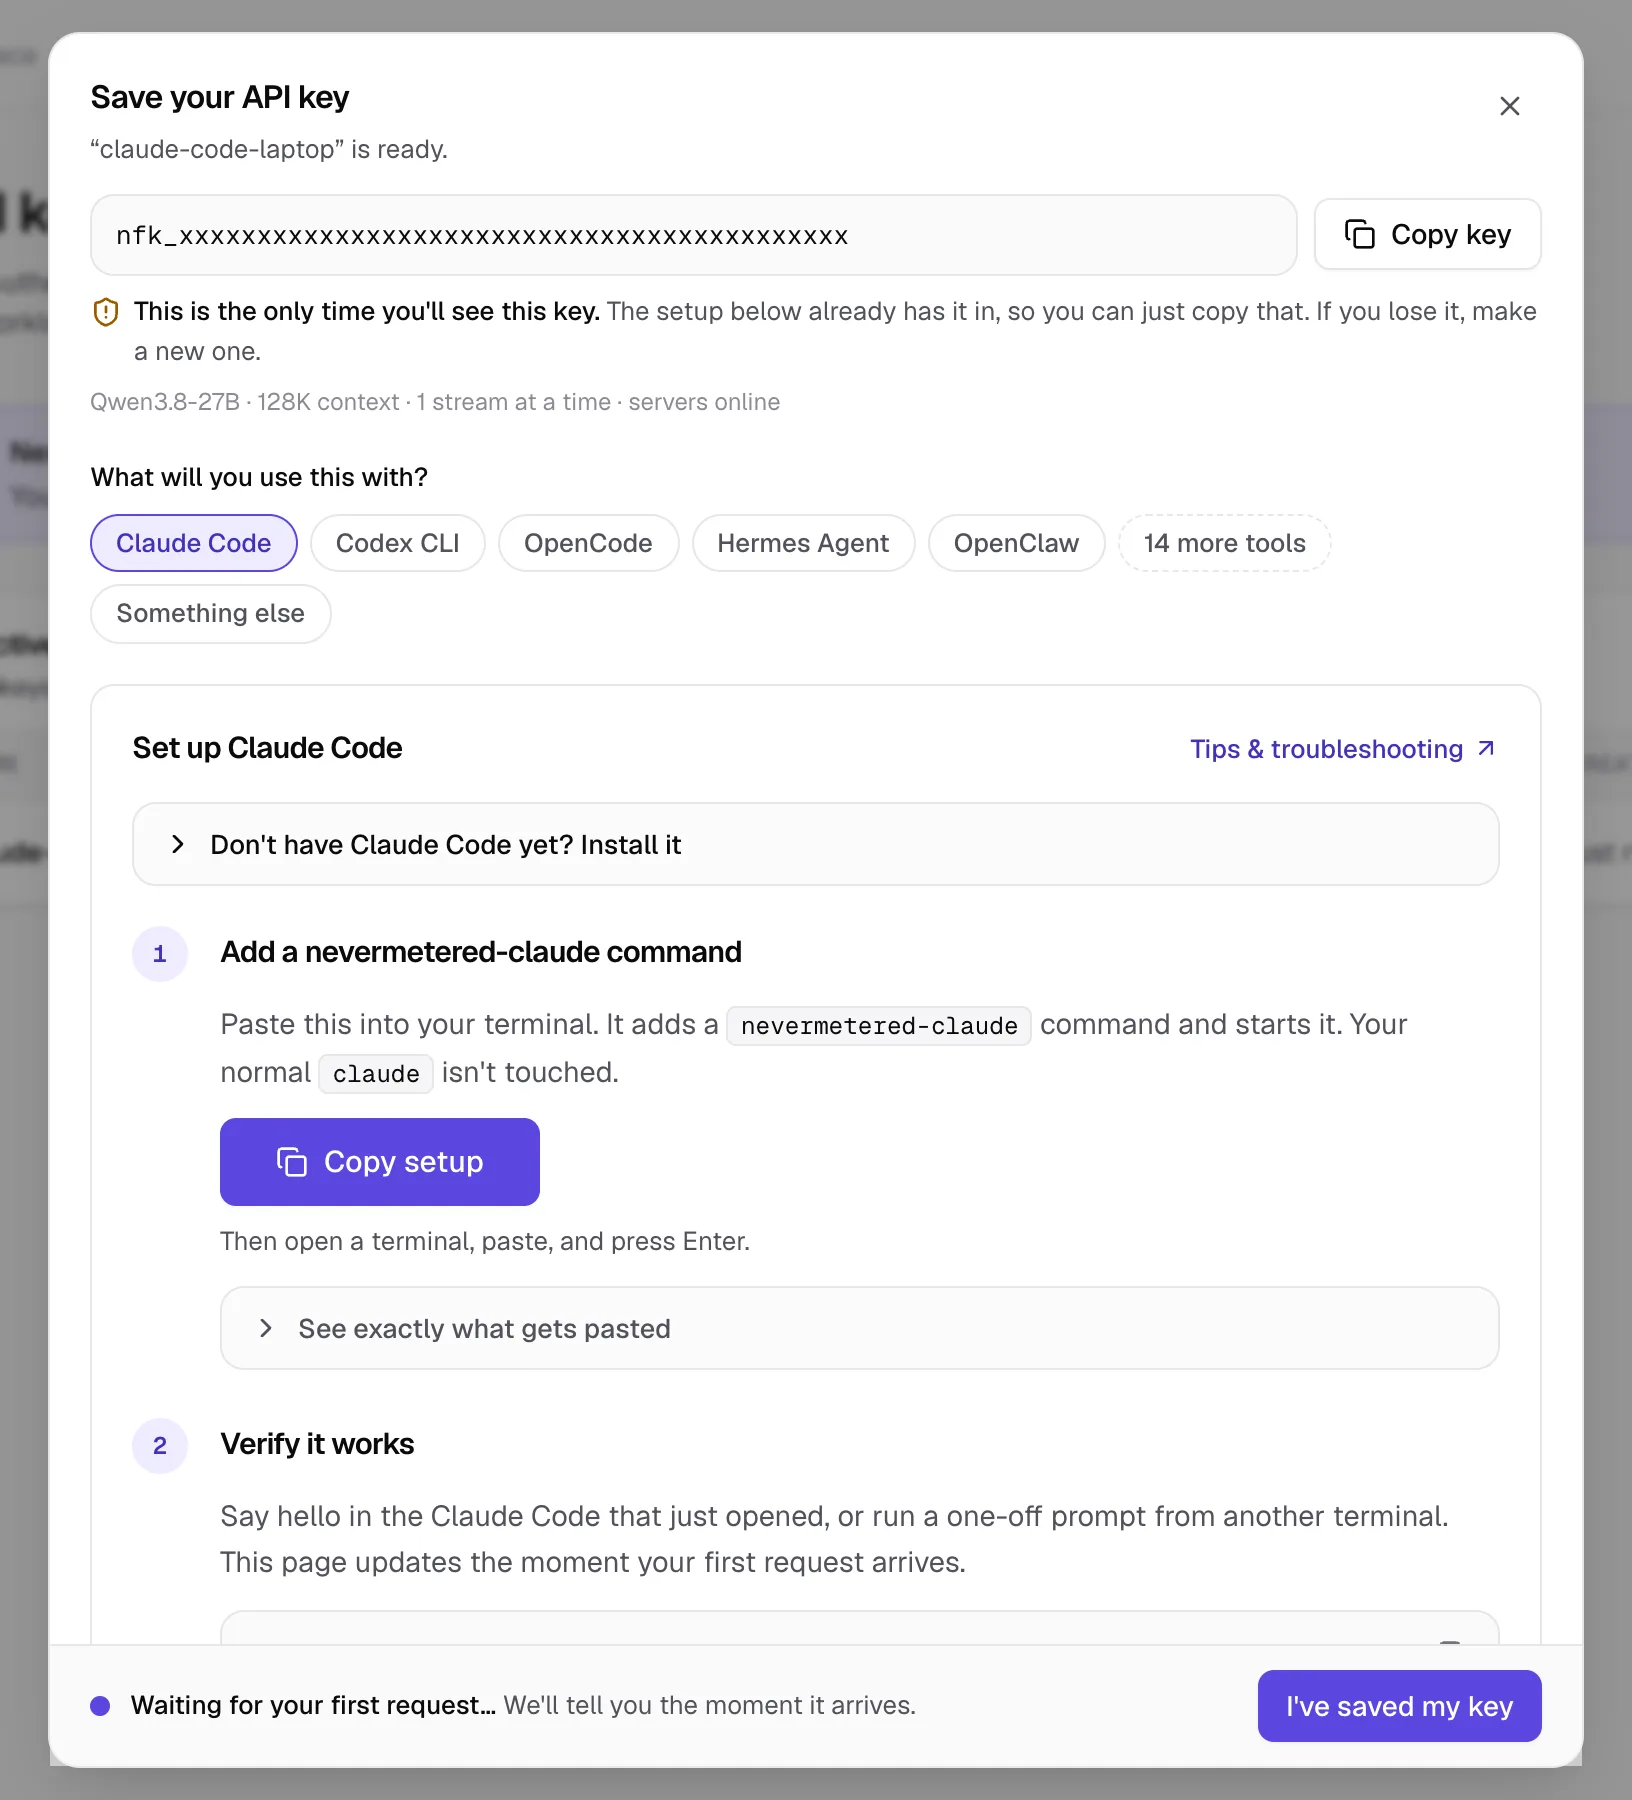
In the same dialog, choose the tool you use. The dialog shows the exact commands for it with your key already filled in. Press Copy setup, open a terminal, paste and press Enter. For Claude Code this adds a separate
nevermetered-claudecommand and leaves your normalclaudealone.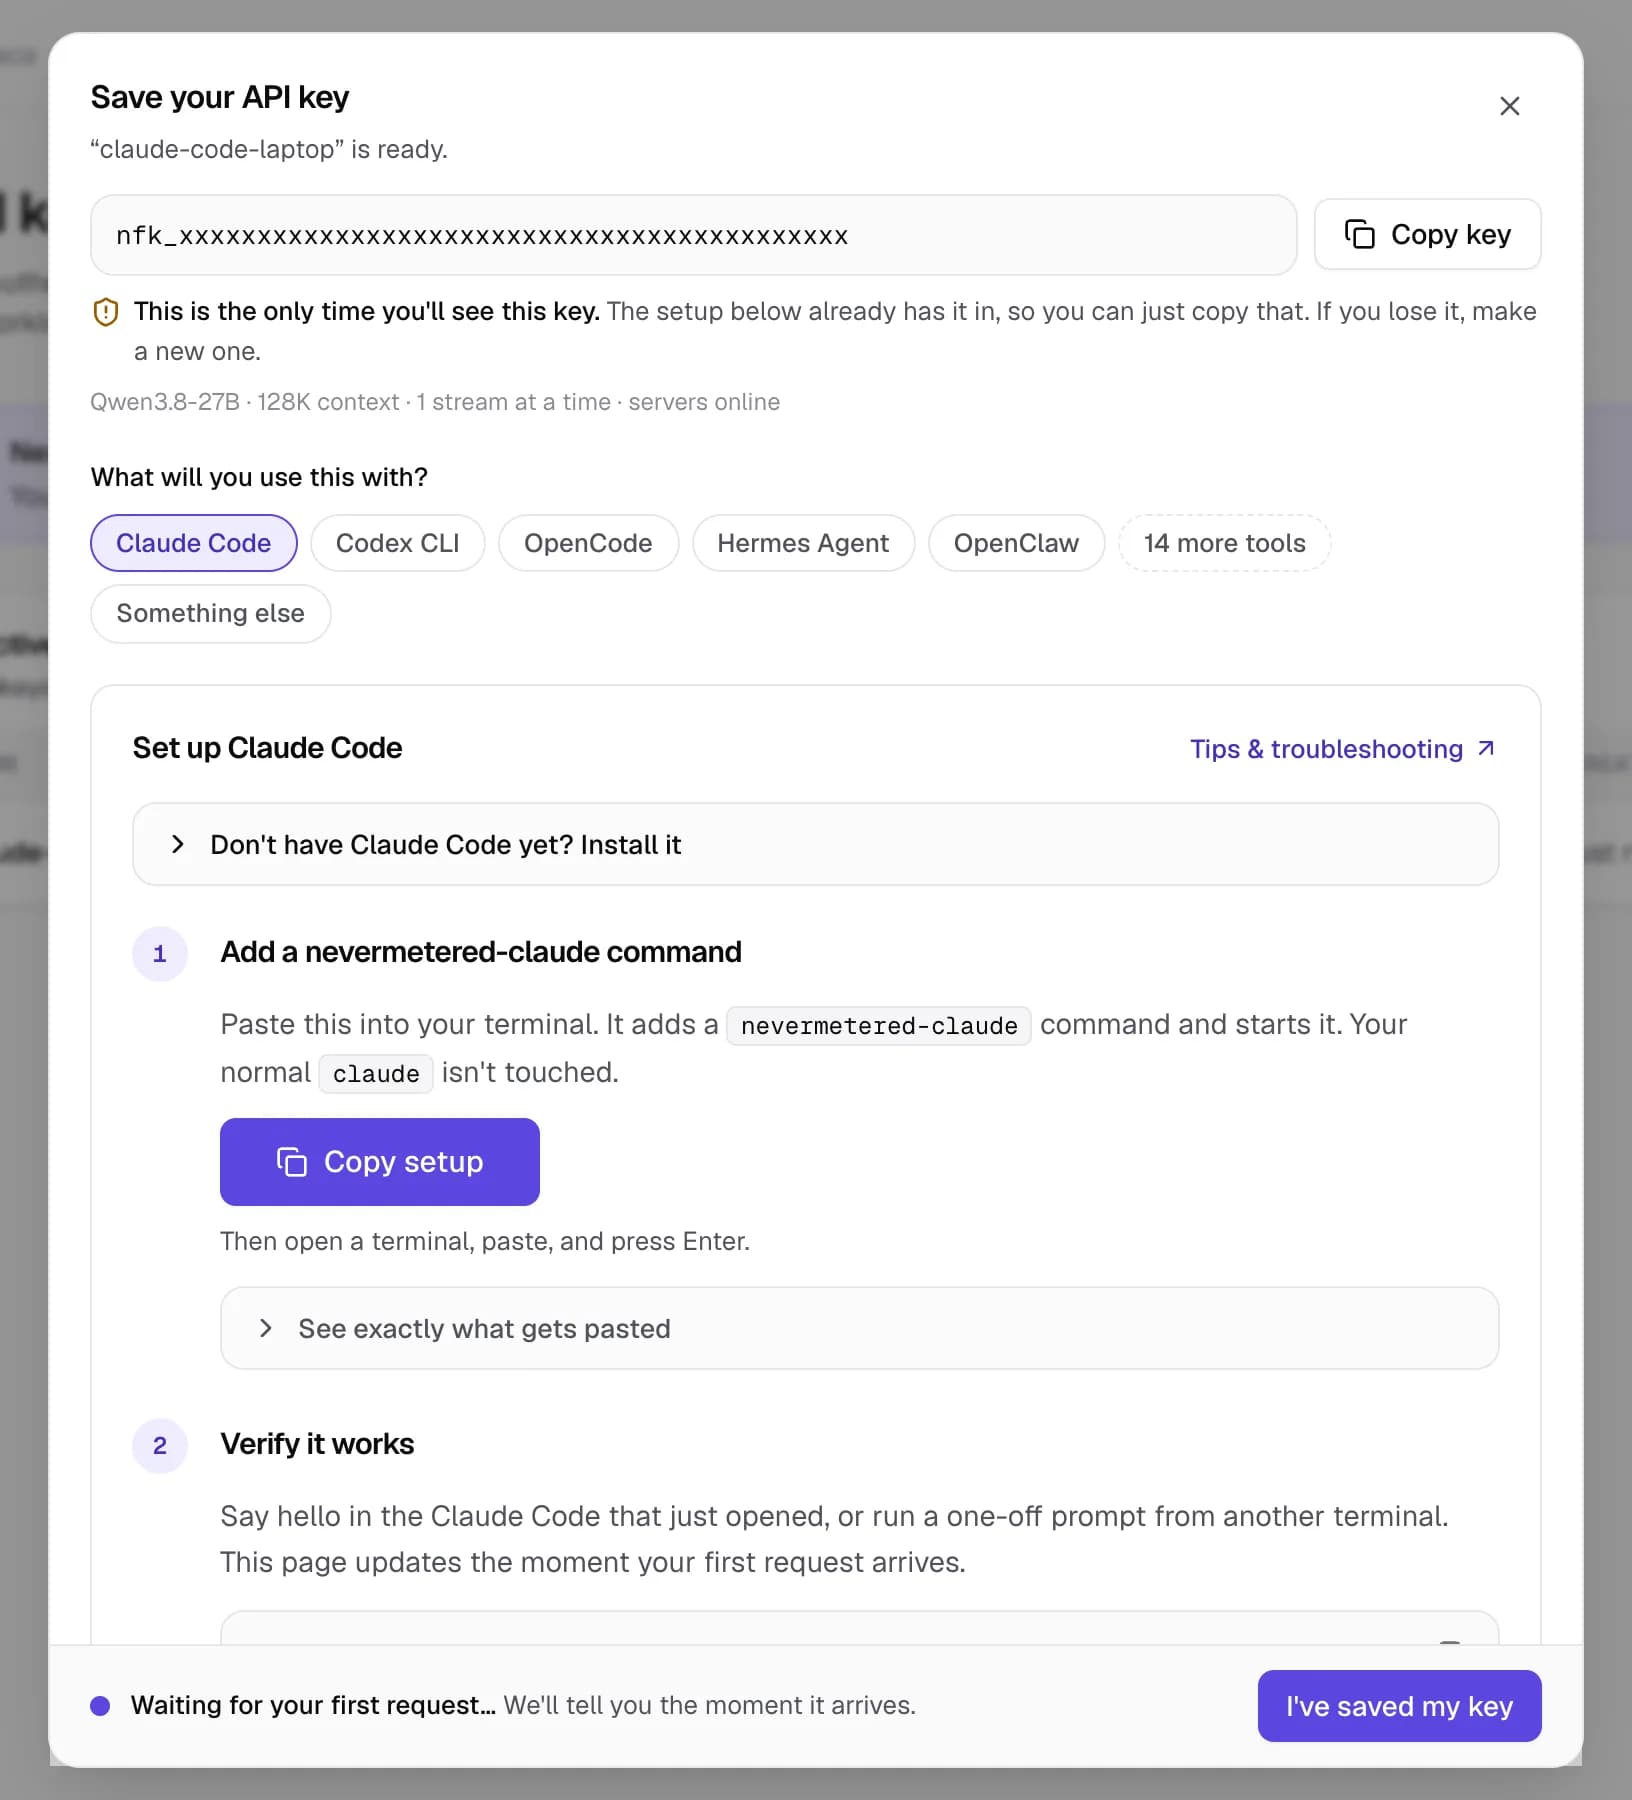
Choose your tool to get its exact setup. (tap to enlarge)
Check it worked
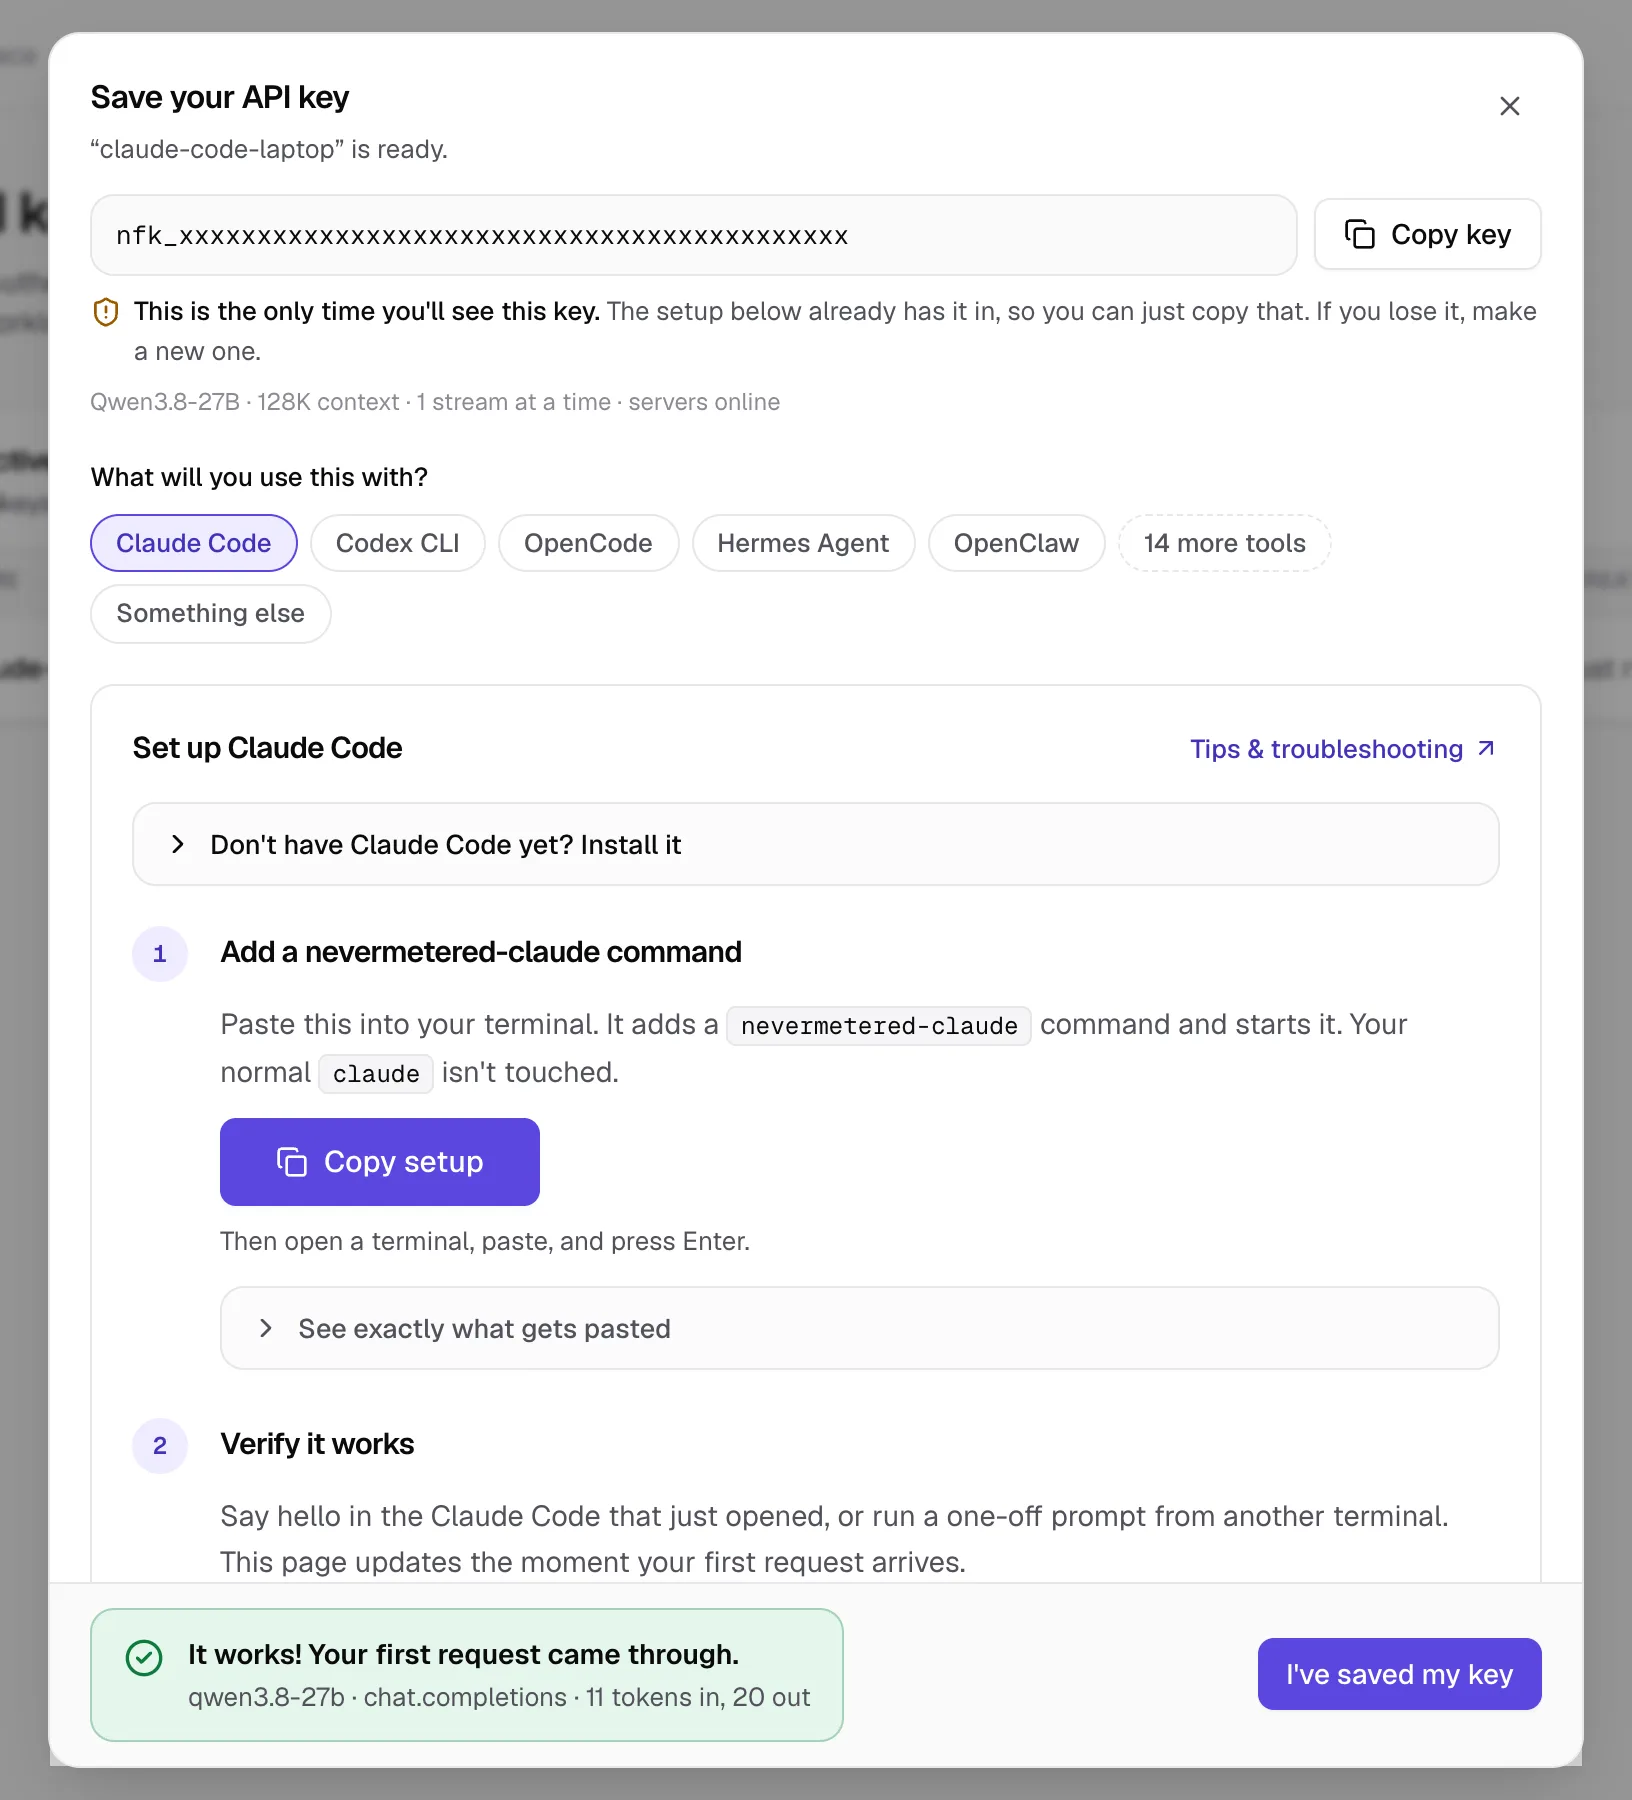
Send a message from your tool. The dialog you left open shows a green box the moment your first request arrives, and the request appears on the Requests page a few seconds later.
No coding tool yet? Test with curl
Paste your key into this first command, then run the second. A short reply means everything is working.
export NEVERMETERED_API_KEY="YOUR_API_KEY"curl https://api.nevermetered.com/v1/chat/completions \
-H "Authorization: Bearer $NEVERMETERED_API_KEY" \
-H "Content-Type: application/json" \
-d '{
"model": "qwen3.8-27b",
"messages": [{"role": "user", "content": "Reply with the word ready"}]
}'What the free plan includes
- A small number of free requests each day (the dashboard shows your exact allowance), which reset at 00:00 UTC.
- One request generating at a time (one "stream"), with a shorter context window than paid plans.
- A verified email address is required.
- Paid plans have no daily request limit and no token quota, 5-hour window or weekly cap: they're priced by how many requests run at once. See pricing for the current plans.
I lost my API key. Can I see it again?
I never got the verification email.
Which model do I use?
qwen3.8-27b, exactly as written. It's the only model, and the setup commands for each tool already use it. You can confirm it any time with GET https://api.nevermetered.com/v1/models.Where do I see what my agents are doing?
- NeverMetered pricing and plan limits (checked 10 November 2026)
- NeverMetered docs: curl and API quickstart (checked 10 November 2026)